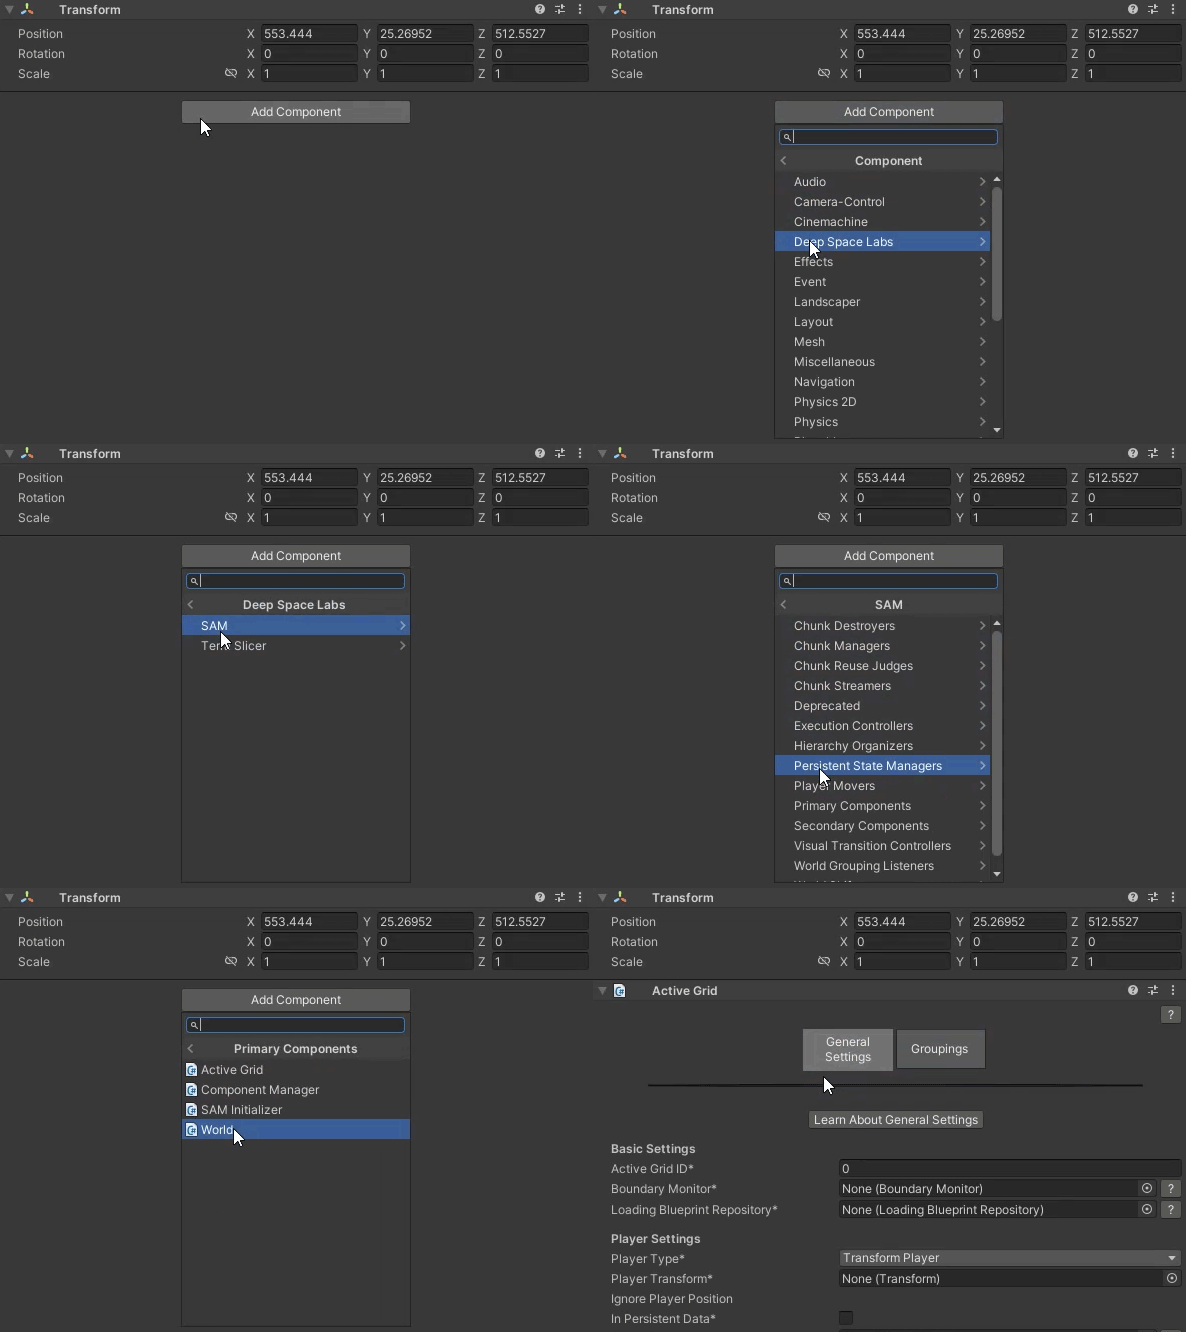

The Active Grid retains the same name within SAM, however you will need to recreate the component using the new Deep Space Labs component creation path. Do note that it is recommended to simply use the game object quick creation option, which will create all basic components you need to get started with SAM. To do so, simply choose GameObject -> Create Other -> Deep Space Labs -> SAM -> Default SAM Setup, either via the top Unity menu bar or by right clicking in the Scene Hierarchy.
Alternatively, if you want to only create a new Active Grid component and nothing else, that information is provided below.
You can add this component by selecting a game object and then selecting from the Top Menu Bar:
Component -> Deep Space Labs -> -> SAM -> Primary Components -> Active Grid

or by selecting a game object and using the Add Component menu via its inspector:
Component -> Deep Space Labs -> -> SAM -> Primary Components -> Active Grid

The Active Grid still serves the same role as before (determining which cells should be loaded based on the player's position), however it has been improved to support multiple World Groupings. As such, each Active Grid is in truth no longer a single grid, but rather a combination of grids, each with separate properties and settings operating in response to the same Player object.
In addition, the Streamable Assets Manager introduces Loading Blueprints and Patterns, which the Active Grid makes use of in order to give you unparalleled control over what cells are loaded at any given time. You will need to create a Loading Blueprint Repository and assign it to your new Active Grid, so it's a good idea to explore the Loading Blueprints Chapter after upgrading your Active Grid.
Want To Learn About Loading Blueprints?
Any settings not mentioned in this Section have been retained and can be copied over from the old script to the new script, unless the field is a Component that also needs to be recreated (such as the Boundary Monitor or Player Mover). Please refer to the Sections for each Component found within the Upgrading Chapter for instructions on how to update these components. Once updated, you can assign the Components to the fields of the same name on the new Active Grid Component.
The ID assigned to the Active Grid. Serves the same purpose even though the name is slightly different.
The options for setting a Player object have been expanded beyond simply setting a Transform, however for now, you can set the Player Type to Transform Player and assign the same Transform used with the old script to the Player Transform field.
If you wish to learn about the new options, take a look at the Active Grids Chapter.
The makeup of the Active Grid (i.e., the collection of active cells) is now determined by the Loading Blueprint used by each Active Grid Grouping. As such, this setting has been removed. You still have the option of using a ring based grid or sectioned grid, however these are set via Loading Blueprints using the Loading Blueprint Editor, a tool that allows you to visualize and edit the loading blueprints/patterns with ease.
These settings were previously only used when no Player transform was assigned. A Player object is now always required, therefore these settings are no longer necessary.
This setting has changed names and is also now set separately for each Active Grid Grouping. Since you will likely only have a single Grouping at this point, you can set the Update World setting on Grouping 1 to whatever value you have set for Cell Objects Enabled.
This setting has changed names and is also now set separately for each Active Grid Grouping. Since you will likely only have a single Grouping at this point, you can set the Enable Auto Tracking setting on Grouping 1 to whatever value you have set for Monitor Inner Area Boundaries When Synced.
The name of the setting has changed, however its functionality remains the same and so you can copy it over exactly.
For a full breakdown of new settings and features that can be found on the Active Grid, please take a look at the Active Grids Chapter.